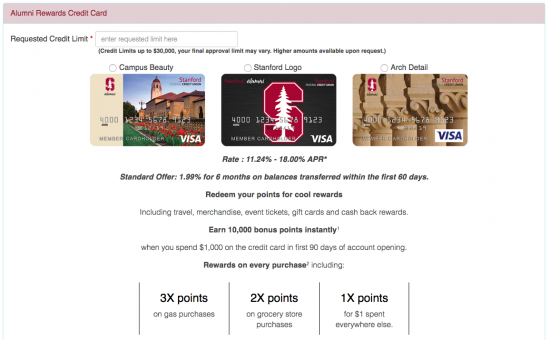
The Stanford Alumni Rewards Visa Credit Card is an easy way for alumni to support the Stanford Alumni Association as a portion of each purchase made with the card will be contributed. On top of that, this card has an attractive APR ranging from 11.24% to 18.00% (assigned rate will be based on creditworthiness APR is subject to change), an extensive rewards program, and no annual fee. The rewards program will give you 3 points per dollar spent on gas, 2 points per dollar spent at grocery stores, and 1 point per dollar spent on all other purchases. You also receive 10,000 bonus points if you spend $1,000 on the credit card in first 90 days of account opening, and, for the first 6 months from your account opening date, you will benefit from a 1.99% intro APR. Would you like to apply for the Stanford Alumni Rewards Visa Credit Card? Scroll down and follow our simple step-by-step guide on how to complete the application online.
Before you submit your personal and financial information, take a look at the Stanford Federal Credit Union privacy policy.
Requirements
To be eligible for this credit card you must meet the following requirements:
- Be at least 18 years of age
- Have a valid US mailing address
- Have a US SSN
- Have a US-issued photo ID
- Be a member of the Stanford Federal Credit Union
How to Apply
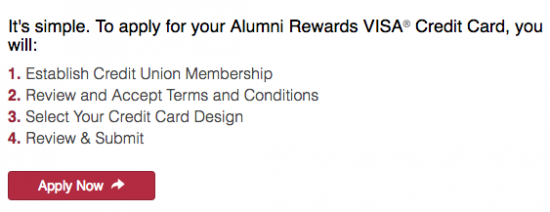
Step 1 – To start the application process, go to this webpage. You will need to be a member of the Stanford Federal Credit Union to apply for this card. If you are not already a member, click the Non-Credit Union Member link and continue to the next step. If you are already a member, click the Credit Union Member link and skip ahead to Step 8.
Step 2 – Click Apply Now to start your credit union application.
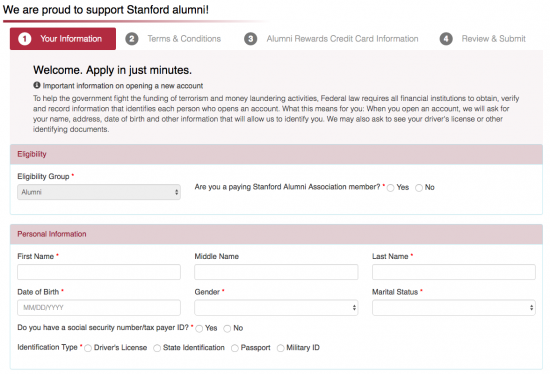
Step 3 – To begin, you must select your Eligibility Group from the drop-down menu and select Yes or No to indicate whether you are a paying Stanford Association member. Next, enter the information listed below into the Personal Information section.
- Full name
- Date of birth
- Gender
- Marital status
Below that, you must indicate whether you have a SSN or tax payer ID, select your Identification Type, and enter your corresponding information. When you are finished, proceed to the next step.
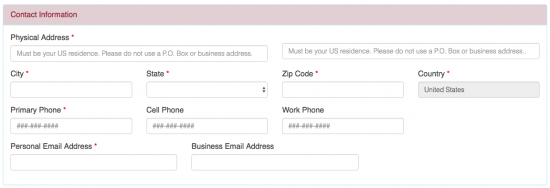
Step 4 – Next, type all of the information listed below in the indicated spaces of the Contact Information section.
- Complete physical address (including city, state, zip code, and country)
- Primary phone number
- Cell phone number
- Work phone number
- Personal email address
- Business email address
Step 5 – In the Mailing Information, if your mailing address is the same as your physical address, tick the box that indicates this is the case. Otherwise, enter the following details of your Mailing Address:
- Mailing address
- City
- State
- Zip code
- Country
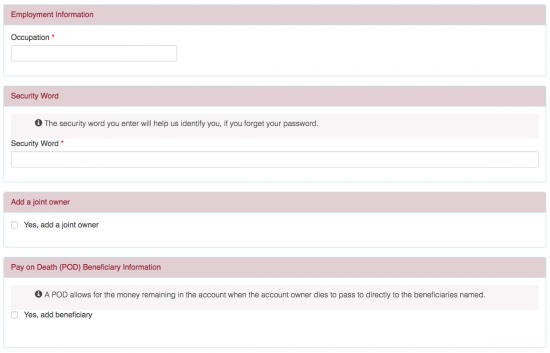
Step 6 – Now, enter your Occupation, choose and enter a Security Word, select whether you would like to add a joint owner, and select whether you would like to add a Pay on Death Beneficiary. When you are finished, click Continue.
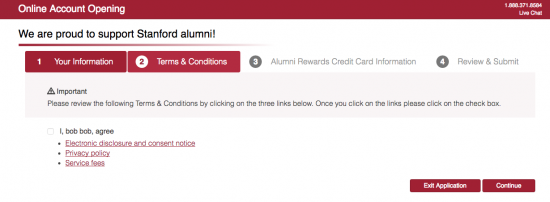
Step 7 – In this step, you will need to click and read the three documents linked in red and indicate your agreement to the terms laid out in said document. When you’re ready, click Continue.
Step 8 – At this juncture, you will need to select your housing situation and enter your Start Date (when you started living at this location), your monthly Rent/Mortage Payment, and your Mortgage (if applicable).
Step 9 – Provide the following information in the Current Employment Information section:
- Employer
- Title
- Start date
- Pay frequency
- Salary amount
If you are self-employed, indicate this is the case by ticking the little box.
Step 10 – In this section, you will need to enter your Requested Credit Limit and select your desired card logo.
Step 10 – You’re almost done! Review and indicate your agreement to the terms and condition for this credit card before clicking Continue.
If you successfully completed all of the above steps, your application is complete. Click Submit to finish the application process.

We hope that our guide has helped you to quickly complete your application and we trust that your request will be accepted. Good luck!

